Wednesday, June 28, 2017

Hello Fly By

Hello.  Gail here today with my project for the I Can Fly event.  There is still time to link up your things with wings projects for a chance to win some loverly Lost Coast Designs and/or Carmen's Verandah rubber.  Come on, you know you want to.........


I used Lost Coast Designs Whimsical Flora and Grunge Border 3".  


This border stamp is huge!!  8" x 3"!!!  First I stamped one end of the border on the RHS of the card.  Then I turned it round and stamped the other end of the border stamp on the LHS, so the measuring tape edges were next to each other.  There are so many lovely details in the stamp.  I used Neon Radiant Green ink.  


I stamped Whimsical Flora with black archival ink, coloured her with pencils and then fussy cut.  The hello is part of Poppystamps Hello plate die cut from red card, which I had also stamped with the border stamp using red ink to give a little subtle texture.  

Thanks for dropping by.  Don't forget to check out the Lost Coast Portal of Creativity for masses of inspiration and the I Can Fly event.  The linky is open until 30th June.  Hugz

Monday, June 26, 2017

Not My Circus

Good morning, and happy Monday. It's Sue here with my second 'Flying' piece, and this has been inspired by an old master (no not really lol)


This is a divider for a 'make it yourself recipe card box' These just happen to be postcard size so that's what I shall be storing here (certainly not recipes ;-)).
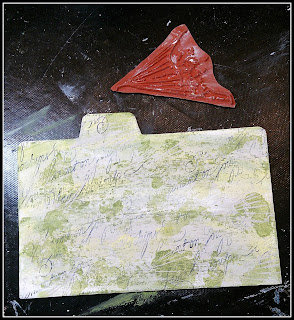
I started with a very roughly painted background.


Then I stamped it with Loopy Calligraphy.


Next came more background stamping with the Leonardo Accessories Set.


Can you tell that I love creating backgrounds lol. To finish mine I stamped the text from Leonardo's Accessories Set.


I used some graph paper to stamp my Steampunk Pony. I used a couple of colours so I could decide which to use. I really liked the Blue Print Sketch one but then decided that the black one fitted in better with my piece.


My guy on horseback is also from Leonardo's Accessories, and the border is from the Fish and Heart set. This is one of my favourites and I've used it loads already.


Carmen's Veranda's Flying Monkey has been watercoloured and after slight surgery he can now ride the pony.


Not My Circus is one of the new Carmens Veranda clear stamps, I don't know who coined the phrase, but I'm crediting it to Leonardo.

There's still time to join in our I Can Fly challenge, so I hope to see you over on the Portal. Have a great week, and thanks very much for looking x

Saturday, June 24, 2017

Muse


I love all things that can fly - birds, butterflies, fairies, etc - so this Lost Coast Event was right up my creative alley.  Being a cat lover as well makes it a perfect match.

I created this square 4 X 4 card for this event using the Party Cat stamp (www.lost-coast-designs.com/party.html) and one of the new clear phrase stamps at Carmen's Veranda (carmensveranda.com/clear.html).

I stamped my kitty with black ink onto white paper and cut her out.  I gave her blue eyes and added a bit of pink marker to the tip of her nose and the inside of her ears.  I cut out the party hat she comes with and traced that shape onto some dark blue scripted paper, cut it out, and gave her a new party hat. The butterfly wings are from a collage sheet I had on hand, so I fastened those on, and she's ready to fly!

My background is four different torn strips of paper - two are from some decorative paper I had on hand and two are from background papers I had created.  I attached them all in a horizontal fashion, torn edges up, and edged the border with blue Distress Ink.  Kitty goes on atop those.  I stamped "Muse" with black ink on white paper, cut it out closely around the letters, edged with black ink, and attached with a piece of foam tape to give it some dimension.

And my kitty is ready to Fly!!


Thursday, June 22, 2017

Rhino 4x4 tile


So I started out with Strathmore Artist Tile 4x4.

 I wanted to see how Distress Oxide worked with Nuance Powers. So I did one color of the Distress Oxide (wilted violet). I had to use my favorite color. Then I did the smooching technique with the Distress Oxide. Dried that and then made a watercolor out of the blue, green and purple  Nuance powers .( had some orange left over from when I did the first 4x4 tile so I added it here too)
Next I added them to my 4x4 tile. I hit that with a heat gun to dry.  When dry I stamped the Grunge Diamond Background from Carmen's Veranda.


 When I was looking at it I thought it still needed something so I splattered black and white paint on it. When that was drying I stamped my Rhino and Winged Skeleton and colored with Copic markers
I cut the wings of the skeleton and attached them to my rhino and then I took a stamping block that had waves on the side and traced that with a thin black marker to give some lines for the rhino to stand on then I glued the rhino in place.

They were fun and fast.

Wednesday, June 21, 2017

Flying Doll


Flying Doll with Golden Wings


I love all things with wings - birds, butterflies, fairies, angels - you name it!  So this month's event called "I Can Fly" was right up my alley. 

For this piece I used the Lost Coast "Calligraphy Doll" stamp (www.lost-coast-designs.com/flyingladies.html).  I stamped her on plain paper with black ink then colored her with Copic Sketch markers.  I rubbed some Inka Gold paste onto her wings to give them some shimmer and shine.  I then cut her out, leaving the calligraphy background behind.  I mounted her onto a background paper I created using the background technique called Faux Chin Colle which I described in the Favorite Background Technique challenge in April.  For this one I used my Gelli plate, a piece of a vintage French book, and yellow, orange and gold acrylic paints, and a flourish stencil.  I edged the whole thing with gold pen and she's ready to fly away!

Tuesday, June 20, 2017

Paw Printz

Hi, Gail her today with a few more details of my Paw Printz card


I love Happy Cat and doesn't he just look so pleased with himself.  


You know, I got so carried away stamping paws I forgot to take pictures, so we just got this one where I have stamped and masked Happy Cat and then started stamping a part of  Pawprints Border in different colour inks and embossing with coloured embossing powders.  I picked up a embossing powder selection of fun colours when I was in the UK last year.


So here he is, with all his pawprints in place.  I generated a sentiment on the computer with a bit of cat speak.  Well, what I imagine is cat speak LOL.

Thanks for dropping by.  The Postcard Challenge is ongoing and have you seen the I Can Fly event that started yesterday??  There's a winner announcement as well!  Inspiration and Mr. Linky over at the Lost Coast Portal to Creativity.  Hope to see you there.  Hugz

Sunday, June 18, 2017

Los Tres Caballeros

Hello and happy Sunday. I can officially report that Summer has now arrived, and so instead of complaining about the rain, we Brits are now complaining about the heat. If we think it's too hot for us, think how these poor guys must be feeling!


Over on the Portal To Creativity we have a postcard challenge which my caballeros were eager to enter.


I started with my 6x4 piece of glossy card, which is the number one rule for postcards. The 6x4 bit - non glossy is also ok. I inked through my stencil with Stazon inks in yellow through to red.


Next I stamped my noble gentleman (Skull Flourish) and embossed him with black EP. Then I stamped him again on a post it note (other sticky backed pieces of paper are available) and masked him. I have to admit masking doesn't really float my boat, but needs must!


Woah now there's 3 of 'em! My lead caballero, although very handsome in orange, wasn't really standing out enough so he was stamped again in white and layered up.


I still needed some words, so I used the ones from Tres Caballeros, and for a while it was all done. But then I got around to thinking, what if....


The whole world looks better through googly eyes!
So please join in with the fun, you don't need to use Lost Coast or Carmen's Veranda stamps, but of course we love it when you do.
Have a fun day, and Happy Father's Day to those who are cellebrating today xx


Wednesday, June 14, 2017

Be Happy

Hi there, Cathy here to show you how I made my Be Happy postcard. I really had fun doing this postcard and I hope you give it a try. Here is most of the supplies I used to make this.


First I added molding paste thought a stencil onto my postcard. Then I let dry. Clean your stencil right away because you do not want to get the paste stuck on there. Then the stencil becomes useless.
Next I put some Nuance powers onto my craft mat and sprayed them with water and made them into watercolor
                                                             Heat dried this
Next I stamped the Corner swirl with green ink and Grunge diamond background with blue ink. I stamped them in their same watercolor colors.
Close up.
Next I used a image from the coloring book. I had already had cut up the page before so I cut out the flower and colored it with Copic markers. Edge it with black so you don't see the white edges.  Then I cut it in half to put on the edge of the post card.
                                                     (this is the other half)


Last I stamped Be Crazy Be Stupid saying and cut it out. Taped it to the postcard and I outlined the words with thin line black marker.
I hope this gets your creative juices flowing and try something like it. Thanks for looking. 


Monday, June 12, 2017

Postcard from Frank

Hello.  My name is Gail, aka ionabunny, and I am so pleased and excited to be posting my first tutorial as a design team member for Lost Coast Designs and Carmen's Veranda.  I made this for the current Postcards challenge using the gorgeous Frankenstein from Carmen's Veranda and the fabtabulous Bubbles Background from Lost Coast Designs.  


I have a particular weakness for Frank and when I saw this stamp I just had to have him.  Isn't he a hunk!  And at just under 3.5" high he is always going to make a striking focal point.  


I always feel a bit sorry for Frank.  I mean, he never asked to be resurrected and have bolts in his neck and a dodgy complexion.  So I decided he need a grungy background.  I stamped, embossed and masked Frank, and then ripped some painter's tape and masked off the edge of my 4 x 6" card.


I inked Bubbles Background with Versamark ink and then removed some of the ink with a paper towel.  I stamped and embossed with black embossing powder.  Removing the ink gives a broken impression and the ripped tape has given me a nice wiggly edge as well.  Then I used an embossing pen to make a ragged frame which I embossed with lilac embossing powder.


Here's the postcard with the complete lilac embossed frame.  I also overheated some of the embossing powder on the edges of the Bubbles Background to give it a more matt appearance in places.


I used shades of purple distress inks to colour the background and Cracked Pistachio and Evergreen Bough distress inks for Frank's face.  I coloured his bolts with a gold pilot marker and used a blue Galaxy marker for his eyes. 

Thanks for dropping by.  There is still plenty of time to make a postcard for the challenge.  Hop over to the Lost Coast Portal To Creativity to see more inspiration from the DT and to link up.  I can't wait to see what you are making.  Hugz

Tuesday, June 6, 2017

New Design Team Member

Good morning all!  I have an announcement to make!  We have a added a new Design Team Member.  Please help me welcome Gail Tasker.


Hi, my name is Gail aka ionabunny.  I am British but moved to Norway 11 years ago where I keep rabbits and chickens and grow my own vegetables.  I also craft with paper and glass.  I trained as a scientist but have always been crafty and call my style simple, but seldom clean.  I enjoy mixed media and mixed techniques and trying anything new. making mostly cards, tags, ATCs, and altered objects.  I love quirky and alternative with a good dose of cute and fell in love with Lost Coast Design and Carmen's Veranda stamps as soon as I found them.  I am still baffled by videos. I am delighted and excited to be part of the design team and hope I can inspire you to try something crafty today.  Hugz

Everyone, please make Gail welcome.  You'll be seeing a lot of really great projects from her in the very near future.

Happy Stamping!
Marilyn
LCD/CV DT Leader